


Traditional Rice Knishes Recipe

Flaky, golden pastry filled with creamy, slightly sweet rice—these Traditional Rice Knishes are perfect for Jewish holidays or any special occasion. Serve with sour cream and strawberry preserves for a comforting and delicious treat.
Ingredients
For the Rice Filling:
- ¾ cup (135g) long grain rice uncooked
- 3 cups (720g) whole milk, plus more for brushing
- 3 tablespoons (38g) sugar
- ½ teaspoon fine salt
- ¼ cup (57g) unsalted butter room temperature
For the Knish Dough:
- 2 ¼ cups (280g) all purpose flour, plus more for rolling unbleached or bleached
- 2 teaspoons baking powder
- ½ teaspoon fine salt
- ½ cup (120g) sour cream cold
- ½ cup (113g) unsalted butter, melted, or neutral oil
- 1 large egg, lightly beaten room temperature
- 2 tablespoons (26g) sugar
For Serving:
- sour cream
- strawberry sauce or strawberry preserves
Instructions
Make the rice filling:
- In a medium saucepan, place the rice, milk, sugar, and salt. Stir to combine. Over medium heat, bring just to a boil, stirring occasionally to prevent sticking. Lower the heat to a low simmer, cover, and cook for about 55 – 65 minutes, until most of the liquid is absorbed. Check after 50 minutes: use a wooden spoon to scrape the bottom of the pot to ensure all liquid has evaporated. (Even if you see liquid in some parts, scrape the bottom to make sure it’s not scorching) Remove from heat, stir in the butter and cool completely. (You can make this a day or two ahead and refrigerate; bring to room temperature before assembling knishes)
Prepare the Dough:
- In the bowl of your stand mixer, whisk flour, baking powder and salt. Make a well in the center and add sour cream, butter, egg and sugar. Mix with the paddle attachment on low speed just to combine. If the dough is too oily and doesn’t come together, gradually add a teaspoon of flour. Scrape onto a lightly floured counter and knead lightly to form a ball. (Don’t worry if the dough isn’t smooth it will come together after resting) Place on a large sheet of plastic wrap and use the plastic to help nudge it into a rectangular disc by folding it over and then pushing the dough up against the plastic to form sharp edges. (This makes it easier to divide and then roll out rectangles) Refrigerate for at least 30 minutes or up to 24 hours.
Roll and Fill the Dough:
- Preheat the oven to 350°F/180°C and line two baking sheets with parchment paper.Divide the dough into three equal pieces. (Let the dough sit out for 5 – 10 minutes if it’s hard to roll) On a lightly floured dough mat or counter, roll each piece into a rectangle about 16 inches/40 cm wide by about 8 inches/20 cm tall. (The wider it is the more pieces you will get, so don’t roll it too tall or you’ll have excess dough around the filling) The dough will be quite thin—about 1/8 – 1/16th-inch thick. Cut off any jagged edges.Place a roll of filling (about 1 1/4 inch/3 cm thick) at the bottom, leaving a 1-inch/2 1/2cm border at the bottom and 1/2 inch/1cm on the edges. (Gently roll a scoop of filling between your hands to form a log and place on the dough). Pull the dough up and over the filling and roll it tightly up to the top. Brush away any excess flour.
Shape the Knishes:
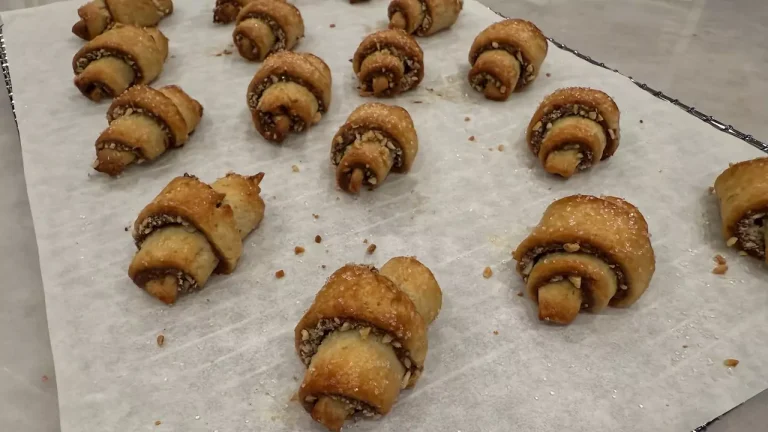
- Use the bottom of your hand like you’re chopping wood to divide the roll in half and then half again to form 8 even pieces. (You can first gently mark the dough with the bottom of your hand before committing to chopping through it) I use a plastic bench scraper to make the final clean cut once I have cut through with my hand. If you use a bench scraper instead of your hand, you won’t stretch the dough far enough from the filling to be able to seal it. (This will make sense when you do it!)Pick up one piece and pinch, twist and flatten one cut side to form the bottom of the knish. Roll the sides gently between the palms of your hands to form a cylinder. Turn it over and pinch and twist the top to seal and then press your thumb into the filling to form a small dimple. Place smooth side down on prepared baking sheet. Press down a little to flatten if it’s too tall. Brush all over with milk, being careful not to pool the milk in the dimple.
Bake and Serve the Knishes:
- Bake for 25 – 28 minutes until golden brown all over; rotate after 12 minutes and place on a second baking sheet so the bottoms don’t over-brown. Place the pan on a cooling rack to cool for at least 15 minutes before serving.Serve warm or at room temperature with sour cream and strawberry sauce or strawberry preserves.
Make-Ahead Instructions:
- Store in refrigerator 2 days or freeze for 3 months. Thaw completely and reheat at 350°F/180°C for about 5 minutes to re-crisp.Or you can freeze the formed knishes and then bake from frozen (on two baking sheets), adding an extra 10 – 15 minutes to the baking time. (Brush with milk before baking)
Notes
•The dough might look slightly oily or lacy after kneading, but don’t worry! It will come together after resting. •These should be tender and light so you don’t want to develop the gluten. Knead just until the dough comes together, adding more flour only if necessary. •If pressed for time, you can form logs instead of individual knishes and adjust the baking time accordingly. Adapted from Diane Bloomfield’s “Grammy’s Deliciously Fattening Rice Knishes” – from her Auntie Rose whose family came to Winnipeg, Canada from Poland.


4 Responses
Hi. I got a flashback from fb that I finally made my grandmas rice knishes 10 yrs ago. I forgot all about them but seeing your recipe sounds about right but I don’t recall sour cream in the dough.
My grandmom had passed away longer than 10 years. I was too young to ask for her recipe, or even to know I could. I do recall being in her kitchen making them tho.
I’ll give you 5 stars since you are the only one who makes these 🤗✡️
Aw thank you and I hope you will try this recipe even though it might be different from her and will still remind you of her and bring you joy. 💕
I’ve been looking and looking for my grandma’s rice pudding( kugel). Have you ever made one? My grandmas was well browned on top, probably used margarine instead of butter, wasn’t that sweet. I can’t imagine she used dairy.
Hi Randi, sorry but I have never make rice kugel but if I come across a good one I will let you know.